Add employee
Follow the below steps to add a new user:
- Click in the menubar on the option File.
- Select the option Employee.
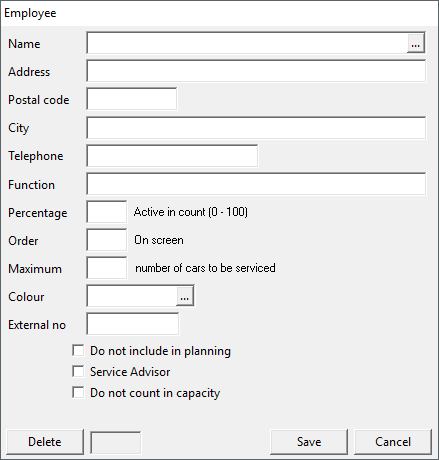
- In the Name field, enter the name of the employee. This name will be displayed on the planboard in the column with all employees.
- In the Functie field, enter what the function of the employee is, such as mechanic or service advisor. It will be displayed on the planboard below the name of the employee.
- In the Percentage active in count field, enter a number from 0 to 100 for how many percent the employee should count in the total planning. By setting this percentage to 90% for example, you keep 10% room in the planning for additional work, drop in customers, calamities etc.
- With the Order field, you can determine the order of the column with employees. This way you can put employees with the same function underneath each other.
- In the field Maximum number of cars to be serviced, you can set a maximum number of cars that the employee can service per day, to prevent that too many work orders are scheduled for the employee.
- In the field Color, you can link a color to the employee. The employee will then be shown in the selected color in the column left of the planning board. This way the various employees can be easily distinguished. Click the
 button to select a color for the employee and click the OK button. It is useful to give an employee the same color as the main operation they will be performing mostly.
 - Turn on the option Do not include in planning to remove the employee from the employee column next to the planning board, but still counts for the days off planning. When you have an online module, this employee still counts for the online planning.maar telt wel mee met de vrije dagen planning, en ook in een eventuele online module.
- Turn on the option Service advisor when the employee can be scheduled as a service advisor.
- Turn on the option Do not count in capacity when the employee should not be included in the total capacity. The number of ae's (job units) in the bottom right corner of the employee will be set to 0 and does not decrease when a user schedules work orders on this employee.
When everything is filled in as preferred, click the Save button to add the employee in the system.
The window is emptied after clicking the save button to enter a new employee if preferred. Click the Cancel button when you are finished adding employees to close the window.
Edit employee
To edit the data of an existing employee:
- Click in the employee window in the Name field on the button to open a list of all entered employees.
- Click on an employee in the list to select it.
- Then click on the OK button to open the data of the selected employee.
You can now edit the preferred data. When you are finished, click the Save button to store the new data..
Delete employee
To delete an employee:
- First select the employee you want to delete.
- Click on the Delete button in the bottom left corner.
A window appears where you need to confirm that you want to delete the selected employee.

- Click on the Yes button to delete the selected employee from the system.
Keep in mind that you cannot delete an employee when there are still unfinished work orders scheduled on their name. If this is the case, an information window appears with the message that the employee cannot be deleted. First, move all unfinished work orders to other employees.

